The first time you lift a roof off a hive, everything seems to happen at once. Bees spill over the top bars, the frames are heavier than you expected, and your hands want to move faster than your head. They shouldn't. A good inspection is calm, deliberate and short — often no more than ten or fifteen minutes from first puff of smoke to roof back on. Get the routine right and the colony barely registers that you were there.
Prepare your kit before you suit up
Lay everything out before you go anywhere near the bees. Searching for a hive tool with your veil on is how beginners end up leaving a box open far longer than they intended.
- Hive tool — one in your hand, a spare in your pocket. They get put down and forgotten more often than you would think.
- Smoker — lit, fuelled and tested before you walk to the apiary, not at the hive side.
- Suit, veil and gloves — zips done up, no gaps at the wrists. Thin gloves you can grip frames with beat thick gauntlets that make you clumsy.
- Bucket with a lid for burr comb and brace comb. Leaving scraps on the ground invites wasps and robbing.
- Notebook or phone to record the date, what you saw and anything you changed.
- Spare box or an upturned roof to rest supers and frames on while you work.
If you keep several hives, decide the order you will inspect in and keep to it. Saving the calmest colony for last means your suit stays cleanest for the one that needs the most attention.
Choose the right moment
Warm, dry and still is what you want. Late morning to early afternoon on a mild day usually works best, because a good share of the foragers are out and the colony is quieter for it. Wind makes bees edgy, and cold or wet weather keeps them clustered and defensive.
Try not to open a colony in the middle of a nectar dearth, when robbers are already testing every entrance, and avoid the late afternoon rush when foragers are returning. If a colony was bad-tempered last time you looked, wait for better conditions rather than forcing your way in.
Light the smoker, then use it less than you think
A few cool puffs of white smoke do two useful things: they mask the alarm pheromone released when a bee is squashed, and they nudge the colony to move down and start feeding. It does not need to be a fog.
Light it with dry material that catches easily and burns cleanly, then pump gently to keep it going. At the hive, give two or three soft puffs at the entrance and wait half a minute. Lift the roof, send one gentle puff across the top bars, and put the smoker down somewhere safe and upright. Over-smoking drives bees off the frames, which makes the queen impossible to find and the whole inspection a waste of everyone's time.
Open the hive in stages
Work from the side or behind the hive, never standing in the flight line at the front. Have a clear place to put things down before you start lifting.
- Puff the entrance and wait. Rushing this step is what turns a settled colony into a stirred one.
- Ease the hive tool under the roof and twist gently to break the propolis seal. Lift the roof and set it upside down on the ground, ready to take supers.
- Peel off the crown board the same way. Take a moment to note anything obvious — feeder level, mouse guard, how far the cluster reaches.
- If you need the brood box, lift supers off one at a time and stack them on the upturned roof. Keep them in order; they go back the same way.
- Never lever against a frame's top bar, and never rock a box free while bees are on the landing board.
Read the frames without rushing
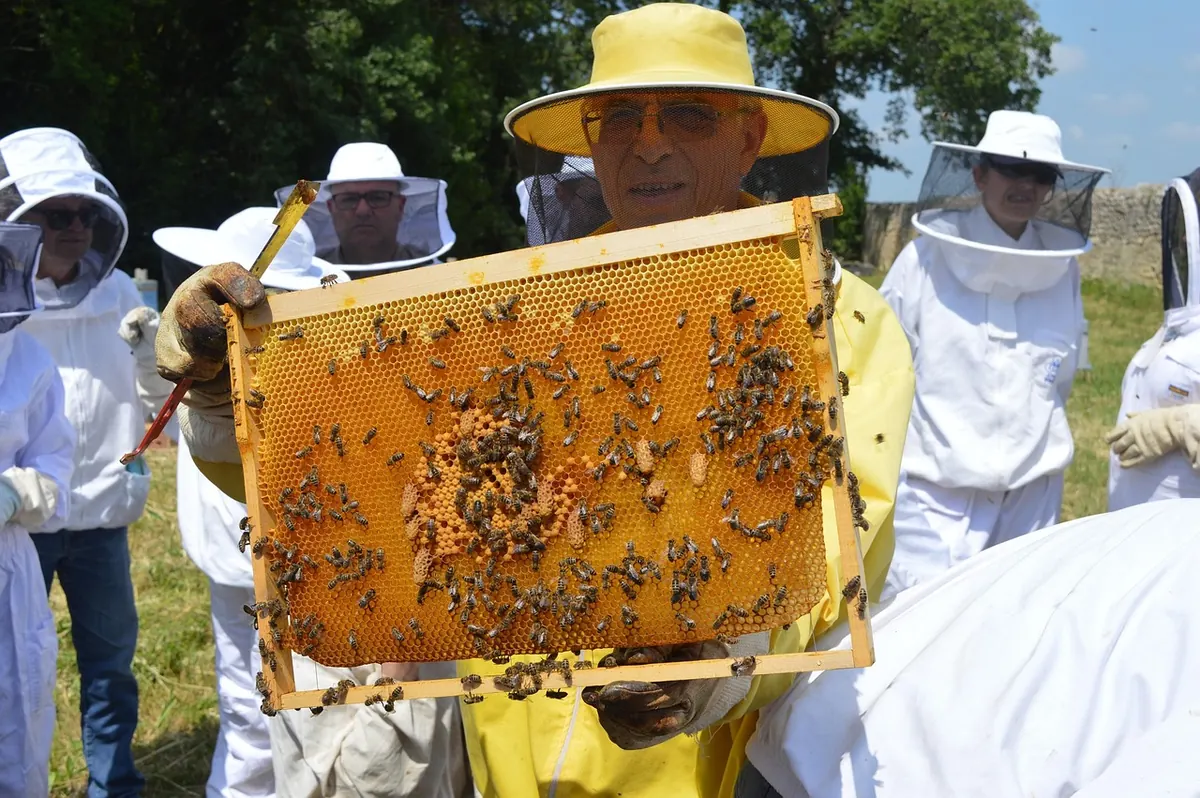
Start at the outside and work inwards. The outer frame is usually the least crowded, so it is a sensible one to lift first and rest against the hive stand. Hold each frame over the open hive as you turn it, so anything that slips lands back inside the colony rather than in the grass.
On the brood frames, you are looking for:
- Eggs and young larvae — eggs standing upright mean the queen was laying within the last few days. This is the single most useful thing you can confirm.
- Sealed brood — flat, biscuit-coloured cappings with a slight dome. Sunken, greasy or patchy cappings deserve a second look.
- Queen cells — cups, charged cells and sealed cells. Count them and note where they sit on the frame.
- Stores — pollen around the brood, capped honey above and at the edges of the nest.
- Space — is there anywhere for the queen to lay, or has the brood nest been plugged with honey?
Keep half an eye open for signs of trouble as well: chalky white mummies at the entrance, bees with deformed wings, or dark, ropy larvae in the cells. If you suspect foulbrood, close the hive calmly and ask your local bee inspector for advice rather than guessing.
Close up and leave them be
Reassemble in reverse order. Before the crown board goes back, check its underside — queens wander across it more often than you would expect. Scrape off any burr comb you have created, then set the boxes down squarely, with the frames the right way round and the correct bee space between them.
Put the roof on straight so rain runs off properly, and leave the entrance as you found it, or adjust it if the season calls for it. Then step away. Standing around watching the entrance only keeps the colony unsettled; give them ten minutes and they will be back to normal flight.
The inspection habit
Aim to go in with two or three questions rather than simply having a look: is the queen laying, is there room, are they building swarm cells? Write down your answers, the date and anything you changed, because next week you will not remember. In the main season, roughly seven to ten days between inspections is a sensible rhythm, backed off when the colony is settled and the weather is poor. Between visits, watch the entrance instead — pollen coming in, calm traffic, no fighting on the landing board tells you plenty. If you are ever unsure what you are seeing, photograph the frame, close up, and ask an experienced beekeeper nearby. No inspection is worth more than the colony's peace.
Photo: jldmat / Pixabay